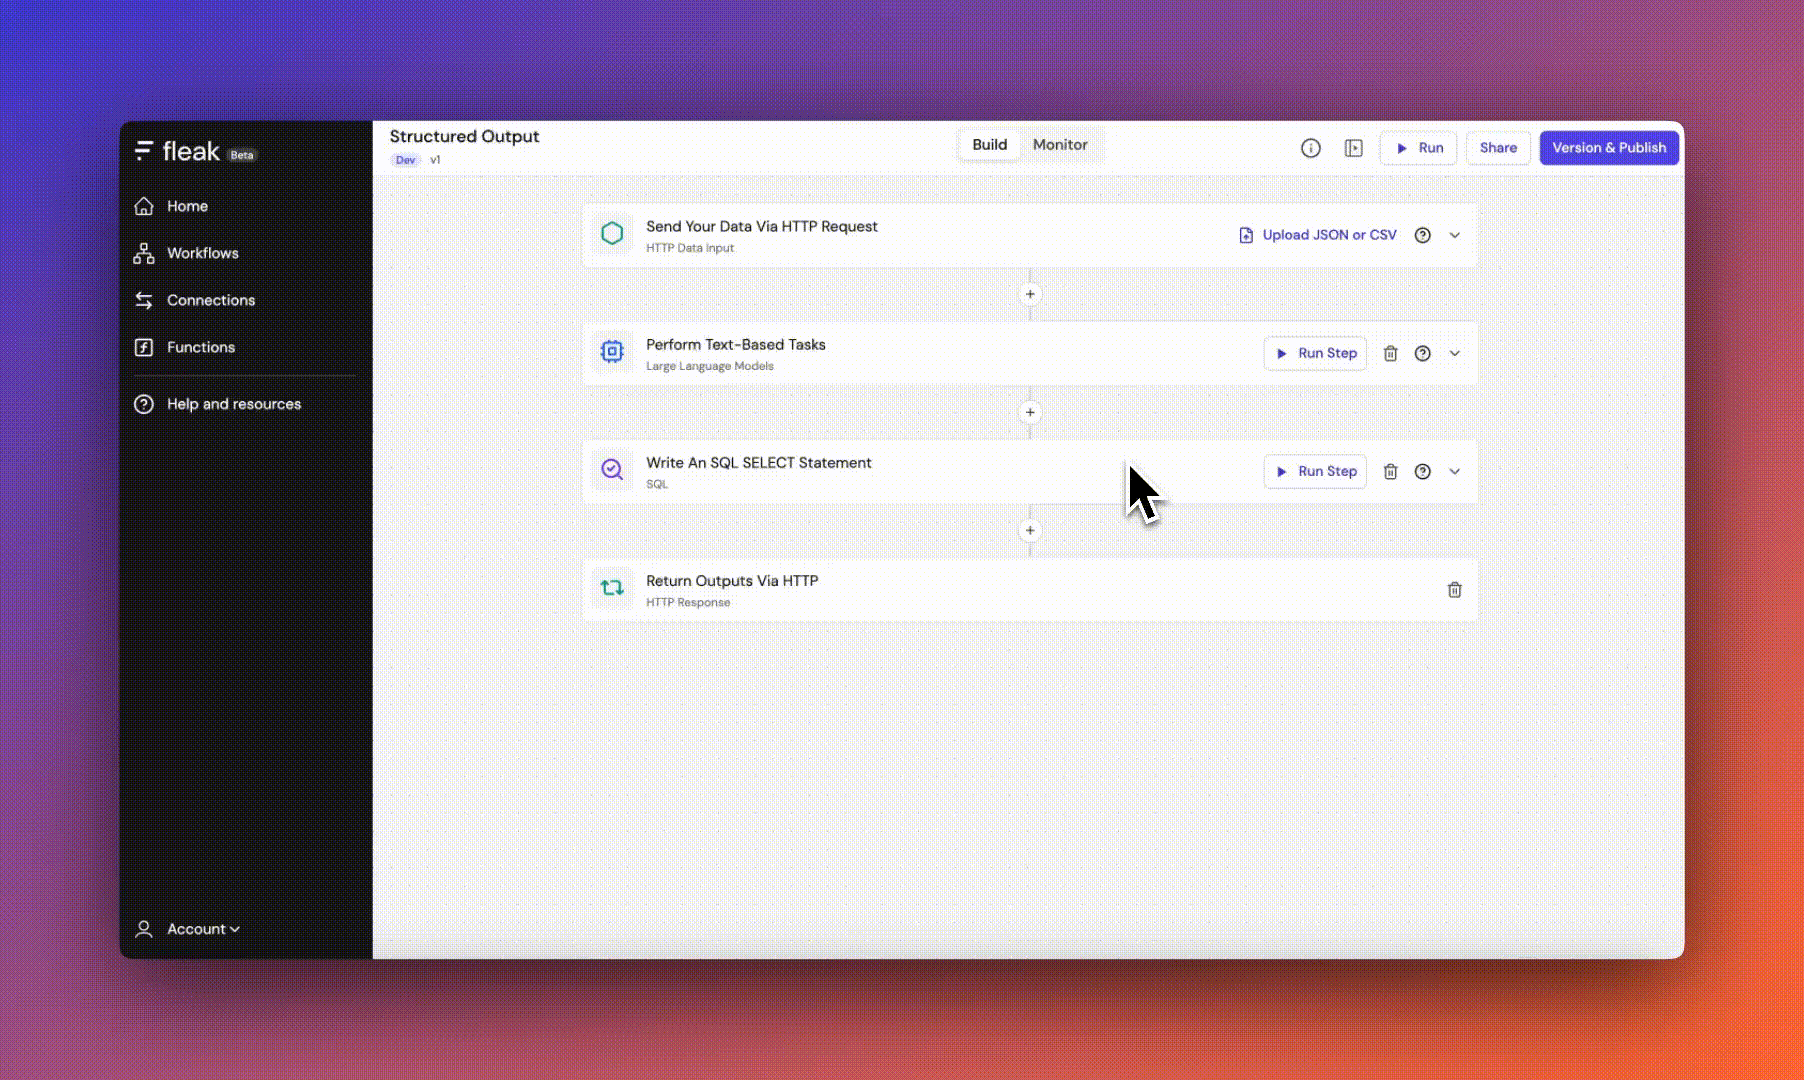
Build a New Workflow
Below are the high level steps to build a workflow:
- Build Your Workflow:
- Use the workflow builder UI to implement your API.
- Each node represents a processing step.
- The output from one node serves as the input for the next.
- Add data processing nodes with a data output node to form a completed workflow.
- Test Your Workflow:
- Provide a sample input in the
HTTP Input node. - Use the
Test Runbutton to experiment with the workflow. - View each node’s output on the right side of the UI after running the test.
- Publish Your API:
- Once satisfied with the workflow, publish it using the
Version & Publishbutton. - Choose to publish as either a staging API or a production API.
- Call Your API:
- Use an HTTP client to call the API.
- Include your API key in the request header.
Add Sample Data
HTTP Data Input node is the very beginning of your Fleak journey. Every user begins building a workflow using a
sample
payload. You can provide example events by either uploading a JSON file, importing a CSV or JSON file, or directly
copying and pasting sample events into the node. Ensure your sample events are representative of your entire workload,
as your workflow will be based on these inputs. During test runs, you may also include corner cases to capture and
handle exceptions effectively while building the workflow.
Inputs
Sample Data (JSON): This field allows you to enter sample data for testing the workflow. You can provide data in JSON format, either as an array of objects or a single object. This sample data will help you see how the workflow behaves with different inputs before using it in a production environment.
[
  {
    "username": "pinkfluffymochi"
  }
]
You can also use the Upload JSON or CSV option to upload your test data, making it easier to work with large or pre-existing datasets.
Usage Tips
If you're working with a single object, make sure your JSON input is properly formatted.
{
  "username": "sampleuser"
}
If your data contains multiple entries, provide them in an array format.
[
  {
    "username": "user1"
  },
  {
    "username": "user2"
  }
]
Features
-
View As Table: Clicking on "View As Table" lets you preview the provided JSON data in a tabular format for easier inspection and visualization.
-
Copy & Paste: You can easily copy sample data from external sources and paste it here, or use the built-in Upload JSON or CSV button to streamline data import.
Ensure your JSON syntax is correct. If the JSON is not properly formatted, the workflow may fail to execute.
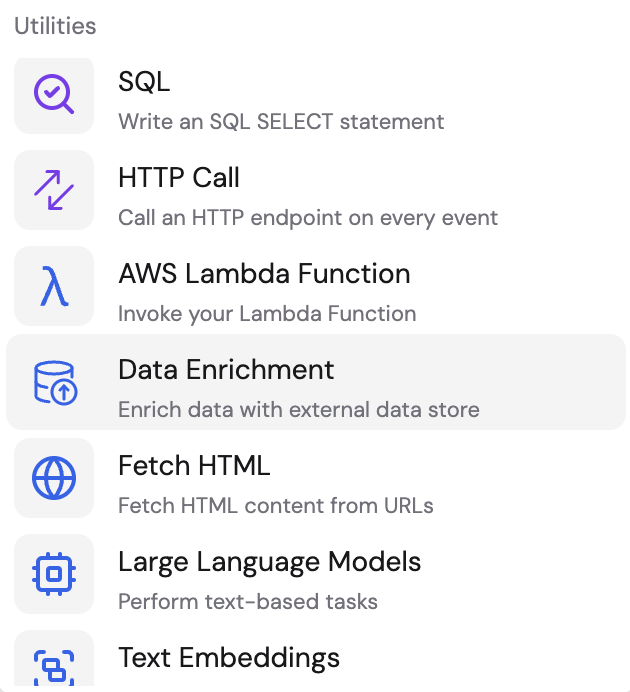
Add Data Processing Nodes
We currently offer nodes such as "SQL", "LLMs", "Text Embeddings", Pinecone lookups, AWS Lambda, "HTTP Calls", "Data Enrichment", and "Fetch HTML" with more on the way.
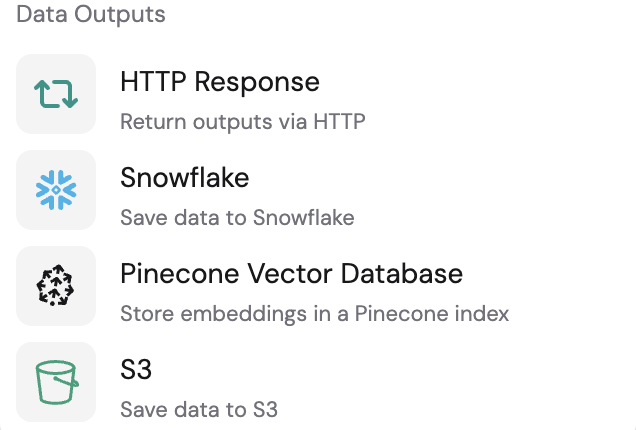
Add a Data Output Node
In a Fleak workflow, the "output destination" specifies where the results of the workflow should be sent. Every workflow ends with an output destination. If you want an immediate response through an HTTP API, select "HTTP response" as the output destination. If you prefer to store the results, choose a connected storage option, which means there will be no HTTP response returned. Currently, we support "Pinecone", "Snowflake", and "S3" storage, with more storage options coming soon.
Test Run & Output
The test run feature in Fleak allows you to validate your workflow and examine the output of each node during development. You can choose to run the entire workflow or test individual nodes to debug specific components.
Run Options
- Complete Workflow Run
- Click the "Run" button in the top right corner
- Executes all nodes in the workflow sequentially
- Results from each node appear in tabs on the right panel
- Individual Node Run
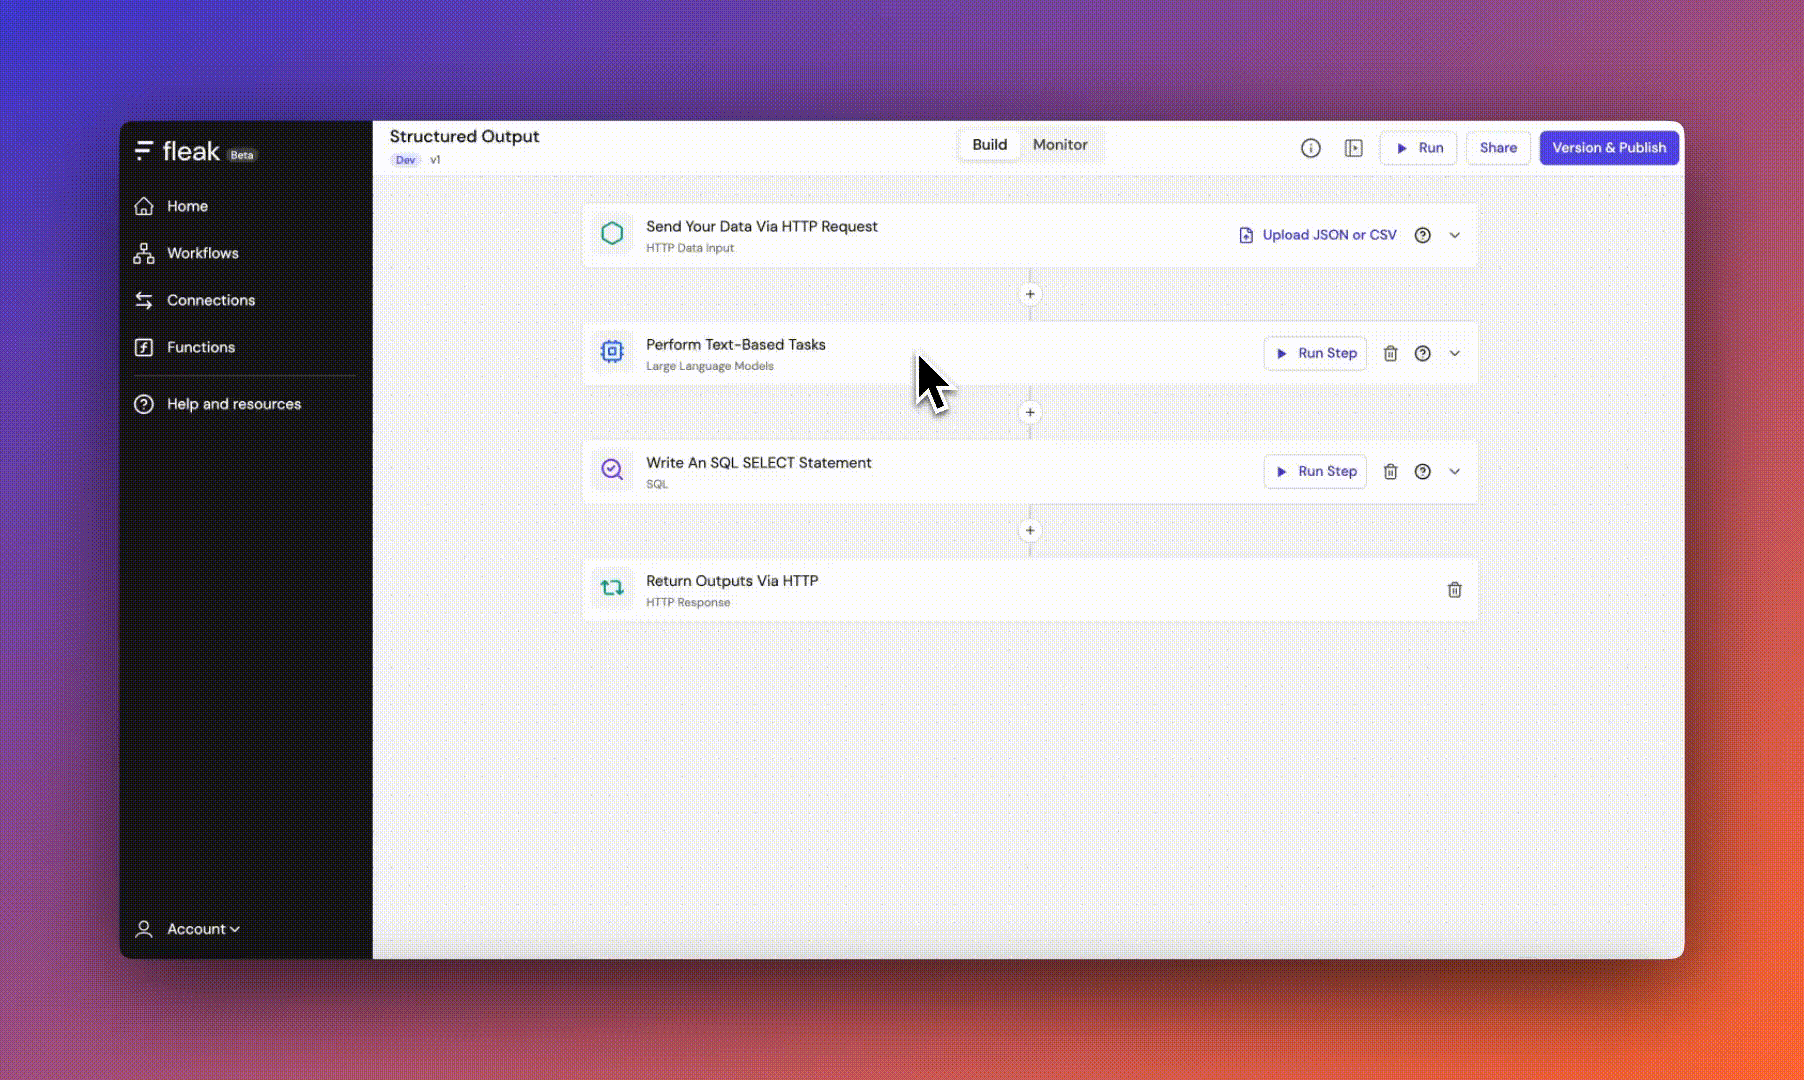
- Click the "Run Step" button within a specific node
- Only executes that particular node
- Useful for debugging or testing node configurations in isolation
Viewing Results
Results Panel
- Located on the right side of the workflow builder after running an individual node or complete workflow
- Displays output from executed nodes in separate tabs
- Each tab is labeled with the corresponding node type (e.g., "Large Language Models", "SQL", "HTTP Call") Output Formats
- JSON View: Default format showing the complete data structure
- Table View: Alternative visualization for structured data
- Toggle between formats using the "json" and "table" buttons
Usage Tips
- Monitor the output of each node to ensure data is flowing correctly through your workflow
- Use the table view for better readability of structured data
- Check the number of output events displayed (e.g., "Output events: 1")
- Please click here to learn more about Fleak Limitations.